
How to wire auxiliary lights on a Jeep


Installing auxiliary lights on your Jeep can significantly enhance visibility and safety during nighttime off-road adventures. Whether you’re planning to tackle rugged trails or simply wish to illuminate your surroundings, understanding the wiring process is essential for a successful installation. This guide will take you through the necessary steps to wire your new light bar efficiently and safely.
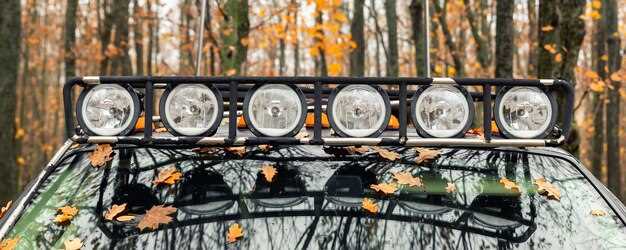
Choosing the right bar is the first step in the installation process. There are various types of light bars available, each designed for specific lighting needs and Jeep models. Once you’ve selected the appropriate light bar, you’ll need to gather the necessary tools and materials, including wiring harnesses, switches, and connectors.
As we move forward, this step-by-step guide will cover everything from basic wiring techniques to ensuring your lights are securely mounted and functional. By the end of this article, you will be well-equipped with the knowledge needed to light up your Jeep with confidence and precision.
Choosing the Right Wiring Kit for Your Light Bar
When it comes to installing auxiliary lights on your Jeep, selecting the appropriate wiring kit for your light bar is crucial to ensure functionality and safety. The right kit will not only make the installation process smoother but also enhance the performance of your lights.
First, consider the light bar’s specifications. Check the wattage and voltage to ensure compatibility with the wiring kit you choose. Most light bars operate at 12 volts, but amperage can vary. A wiring kit that matches the light bar’s requirements will prevent overheating and potential damage.
Next, assess the gauge of the wiring in the kit. Thicker wires, typically 12 or 14 gauge, are better suited for high-wattage applications as they can handle more current without losing power. Using inadequate gauge wires can lead to flickering lights or even short circuits.
Additionally, make sure the wiring kit includes essential components like a relay, fuse, and switch. The relay is vital for preventing damage to your vehicle’s electrical system by allowing the light bar to draw power directly from the battery. A fuse is equally important as it protects the circuit from overcurrent.
Consider the length of the wiring as well. Ensure that the wires are long enough to reach from your light bar to the battery and switch without being strained. Many kits come with varying lengths, so choose one that accommodates your Jeep’s specific layout.
Lastly, look for kits with protective features such as wire loom or heat shrink tubing. These additions help prevent abrasion and damage, extending the life of your wiring and guaranteeing optimal performance of your light bar.
Step-by-Step Guide to Connecting the Light Bar to Power
Connecting a light bar to your Jeep’s power source requires careful attention to detail to ensure proper functionality and safety. Follow this step-by-step guide for successful wiring.
Start by gathering all necessary materials: your light bar, wiring harness, connectors, fuse, relay, and tools including wire strippers, electrical tape, and a wrench. Ensure you have access to the power source, typically the battery or the fuse box.
Begin by mounting the light bar securely to your Jeep. Choose an appropriate location that provides maximum visibility while taking into account the mounting hardware included with the light bar. Tighten the brackets to ensure stability.
Next, locate the wiring harness that comes with your light bar. This usually includes a power wire, a ground wire, and a switch. Connect the ground wire to a solid metal point on the Jeep chassis or the battery’s negative terminal. Make sure this connection is clean and tight to prevent any electrical issues.
Attach the positive power wire to the battery’s positive terminal. It’s essential to install a fuse close to the battery to protect the wiring from overload. Cut the positive wire to the desired length, strip the ends, and connect it to the fuse holder. Then, connect the other end of the fuse holder to the positive terminal of the battery.
Install the relay in a suitable location, such as the engine bay. Connect the power wire from the light bar to the relay’s output terminal. The input terminal of the relay should be connected back to the power source to complete the circuit.
The switch allows you to control the light bar from inside the vehicle. Determine the preferred location for the switch and run the necessary wiring from the light bar to the switch. Connect the switch wire to the relay’s control terminal, ensuring it will activate the relay and power the light bar when turned on.
Once all connections are made, secure the wiring using zip ties to prevent any movement during driving. Double-check all connections for tightness and insulation to avoid short circuits.
Finally, test the system to ensure the light bar functions properly. Turn on the switch and verify that the light bar illuminates. If it does not turn on, recheck the wiring connections and ensure the fuse is intact.
Testing and Troubleshooting Your Electrical Setup
Once you have wired your auxiliary light bar to the Jeep, it’s vital to test the electrical setup to ensure everything operates correctly. Begin by visually inspecting the connections for any signs of damage, loose wires, or corrosion. A clean, solid connection is crucial for optimal performance.
Next, use a multimeter to measure the voltage at the light bar terminals. Turn on the ignition and switch on the auxiliary lights. You should see a voltage reading consistent with your vehicle’s power source, typically around 12 volts. If the voltage is significantly lower, check the wiring for any breaks or improper connections.
If the light bar does not illuminate despite a proper voltage reading, inspect the light bulbs themselves. Sometimes, bulbs can burn out during installation or may be faulty. Replacing them can resolve the issue.
In instances where the lights flicker or dim, this may indicate a problem with the relay or switch. Ensure that the relay is seated correctly and that there are no loose wires. If everything appears secure, consider replacing the relay to see if performance improves.
For those experiencing intermittent issues, it may be useful to trace the ground wire. A poor ground connection can lead to unreliable performance. Ensure that the ground is securely attached to a clean, bare metal surface on the frame of the Jeep.
After addressing any identified issues, re-test the entire setup to confirm that the auxiliary light bar functions as intended. Regularly checking your electrical setup can prevent future complications and ensure that your lights operate effectively during your outdoor adventures.